


🎧 How to Replace Sony WH-1000XM3 Ear Pads
(Complete Guide)
If your Sony WH-1000XM3 headphones don’t feel as comfortable as before, the ear pads are often the reason. Over time, the foam compresses, the surface material wears out, and comfort — as well as isolation — slowly declines.
The good news? Replacing Sony WH-1000XM3 ear pads is easier than most people think. You don’t need special tools, and the entire process can be done in just a few minutes.
In this complete guide, you’ll learn how to remove the old ear pads, install new ones correctly, avoid common mistakes, and restore the original comfort and seal of your headphones.
Whether your pads are cracked, flattened, or simply uncomfortable — this guide will help you make your XM3 feel like new again.
🗺 Table of Contents — Sony WH-1000XM3 Ear Pad Replacement
- 🔎 When Should You Replace Sony WH-1000XM3 Ear Pads?
- 🛠 Tools & Preparation Before Starting
- 🎧 Step 1 — How to Remove Old WH-1000XM3 Ear Pads
- ✨ Step 2 — How to Install New Sony WH-1000XM3 Ear Pads
- ⚠️ Common Installation Mistakes to Avoid
- ⭐ Recommended Sony WH-1000XM3 Replacement Ear Pads
- 🎧 Why New Ear Pads Improve Comfort & Sound
- ❓ FAQ — Sony WH-1000XM3 Ear Pad Replacement
🔎 When Should You Replace Sony WH-1000XM3 Ear Pads?
Many Sony WH-1000XM3 owners wait until their ear pads look damaged before replacing them — but in reality, comfort and performance often decline long before visible wear appears.
Because ear pads slowly compress over time, it can be difficult to notice the change day by day. You simply adapt — until one day the headphones don’t feel as comfortable or immersive as they used to.
⚠️ Common Signs Your WH-1000XM3 Ear Pads Need Replacing
- ❌ Ear pads feel flatter than before
- ❌ Increased pressure on your ears during long listening sessions
- ❌ Heat builds up faster inside the ear cups
- ❌ Noise isolation feels weaker
- ❌ Surface material shows cracks or peeling
- ❌ ANC feels slightly less effective
💡 Quick test: press the ear pad foam gently and release it. If it rebounds slowly or feels stiff, the foam is already worn.
🎧 Why Worn Ear Pads Affect Comfort & ANC
The Sony WH-1000XM3 relies heavily on a proper ear pad seal. When the foam compresses, small air gaps appear around your ears, which can reduce passive isolation and make Active Noise Cancelling feel less consistent.
| If your ear pads are worn... | You may notice... |
|---|---|
| Foam compression | Less comfort and more ear pressure |
| Seal weakens | More outside noise leaks in |
| Surface wears out | Heat & discomfort during long sessions |
🎯 Replacing the ear pads restores comfort, seal and the original listening experience — without changing your headphones.
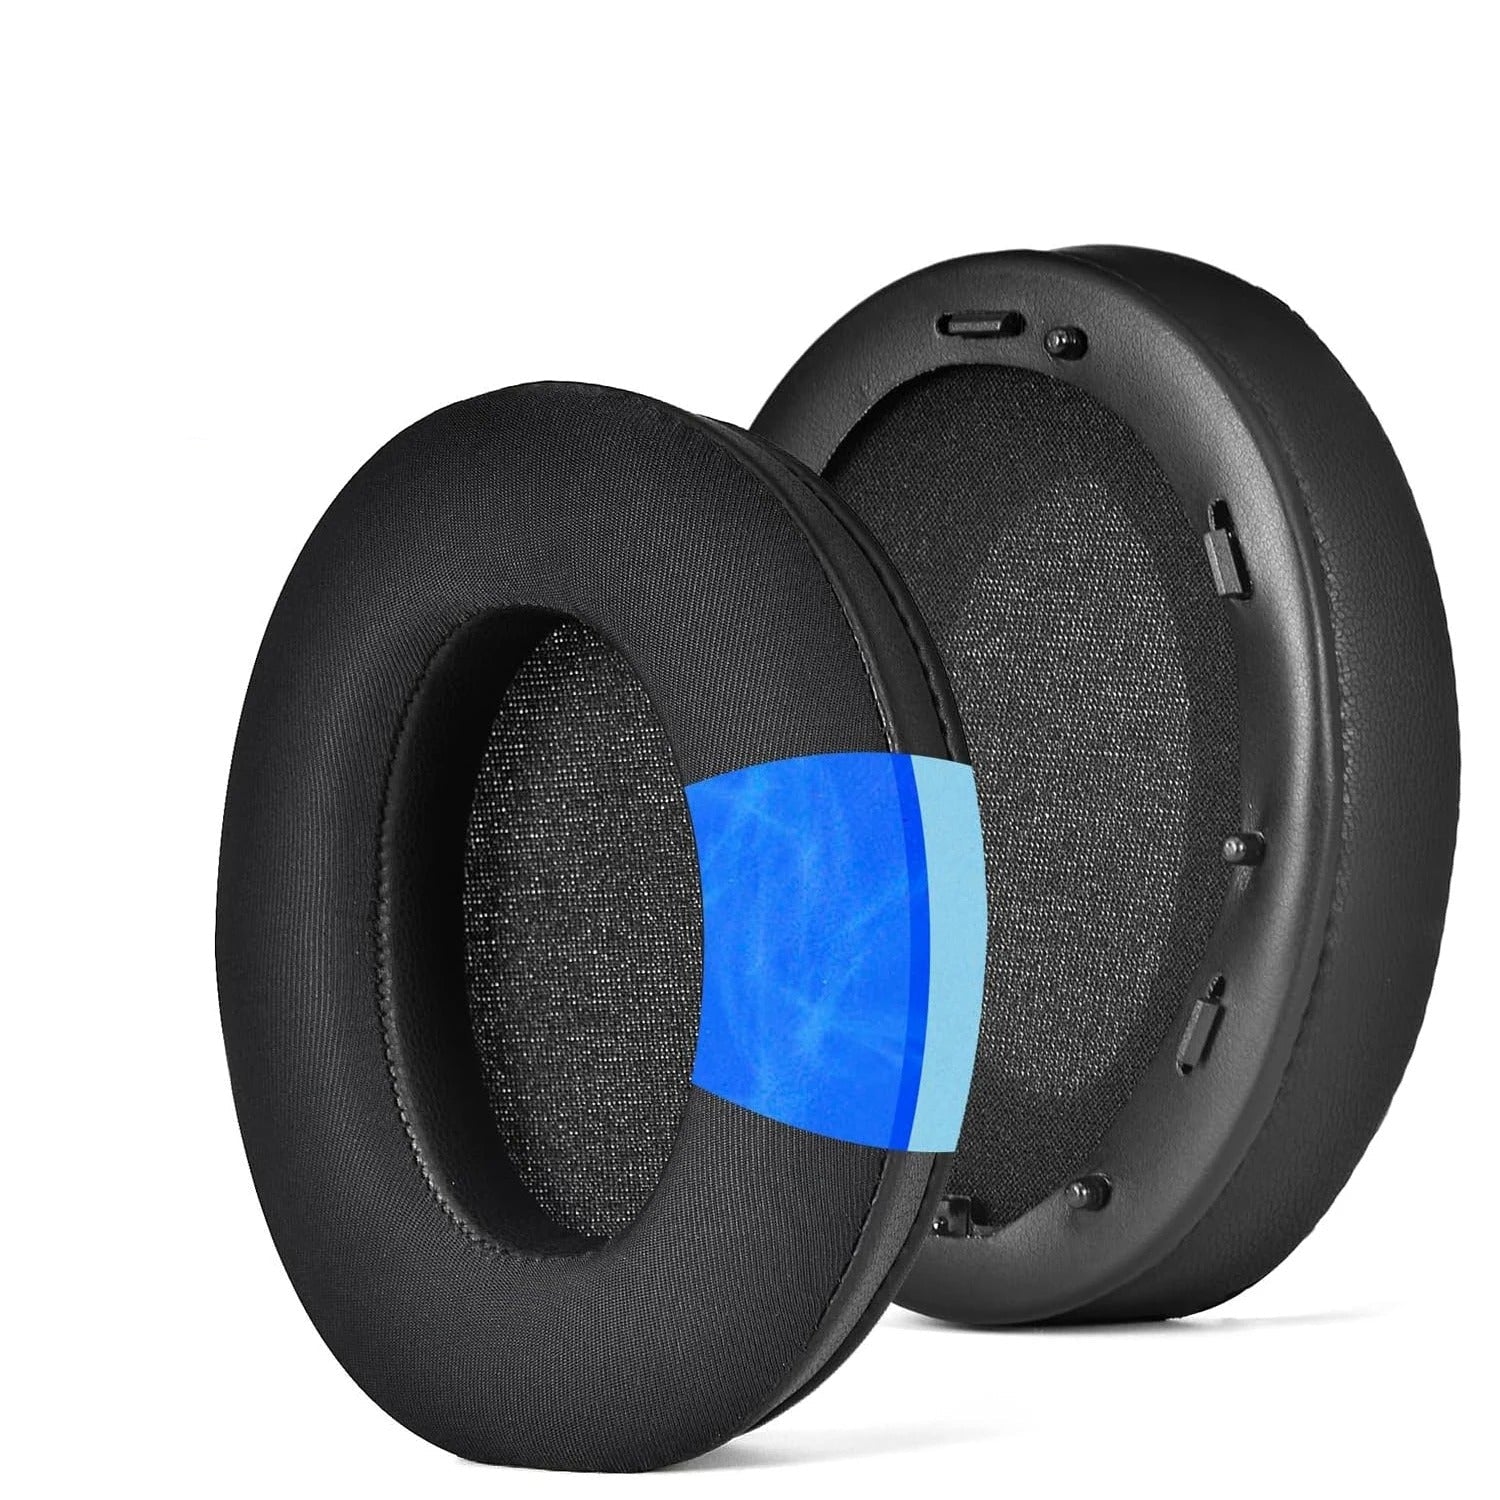
⭐ Recommended Sony WH-1000XM3 Replacement Ear Pads
These replacement ear pads for Sony WH-1000XM3 are designed to match the original fit, helping restore comfort, seal and ANC performance.
- ✔️ Exact fit for WH-1000XM3
- ✔️ Soft memory foam feel
- ✔️ Helps maintain ANC seal
- ✔️ Quick installation
Next: Tools & preparation before starting the ear pad replacement.
🛠 Tools & Preparation Before Replacing Sony WH-1000XM3 Ear Pads
Good news — replacing Sony WH-1000XM3 ear pads does not require advanced tools. The process is simple, but taking a few seconds to prepare correctly will make installation faster and help avoid damaging the mounting clips.
Before starting, work on a clean and flat surface with good lighting. This makes it easier to see the ear pad attachment ring and install the new pads evenly.
🔧 What You Need
- ✔️ Your Sony WH-1000XM3 headphones
- ✔️ A clean table or desk
- ✔️ A soft cloth (optional for cleaning)
- ✔️ Your new replacement ear pads
🎯 No screwdriver or special tool is required — the ear pads are clip-mounted.
⚠️ Before You Start — Important Tips
The WH-1000XM3 ear pads attach using small plastic clips. They are durable but should be handled gently. Avoid pulling aggressively — slow and steady removal is always best.
- ❌ Don’t twist the ear pads forcefully
- ❌ Don’t use metal tools (can scratch plastic)
- ✔️ Pull gradually around the edge
- ✔️ Keep pressure even while removing
💡 Pro tip: replacing one ear pad at a time helps you compare positioning and installation.
⭐ Ready to Install New Ear Pads?
Make sure you’re using model-specific Sony WH-1000XM3 ear pads so installation is easy and the seal stays perfect for comfort and ANC performance.
🛒 View Sony WH-1000XM3 Ear Pads →
🎧 Step 1 — How to Remove Sony WH-1000XM3 Ear Pads
Removing the original Sony WH-1000XM3 ear pads is easier than most people expect. The pads are attached using small plastic clips — so the goal is simply to release them slowly without forcing.
Take your time during this step. A gentle, gradual approach prevents damage and makes installing the new pads much easier later.
🛠 Step-by-Step Removal Guide
- Hold the headphone ear cup firmly with one hand.
- Slide your fingers under the inside edge of the ear pad.
- Gently pull upward until you hear the first clip release.
- Move around the ear cup slowly, releasing clips one by one.
- Continue until the ear pad comes off completely.
🧠 Pro Tip — Work Around the Edge
Never pull the ear pad straight upward from one side. Instead, release the clips gradually around the ear cup — this reduces stress on the plastic mounting ring.
- ✔️ Slow movement = safer removal
- ✔️ Even pressure prevents broken clips
- ✔️ Easier installation later
⚠️ If the pad feels stuck, stop pulling harder — move to another point around the edge and continue releasing clips.
🧼 Quick Cleaning Before Installing New Pads
Once the old ear pad is removed, take a moment to wipe the mounting area with a soft cloth. Removing dust and small foam particles helps the new ear pads sit evenly and seal correctly.
🎯 Clean surface = easier installation + better long-term fit.
⭐ Ready for the Next Step?
After removing the old pads, you’re ready to install your new Sony WH-1000XM3 replacement ear pads and restore comfort.
🛒 View Sony WH-1000XM3 Ear Pads →✨ Step 2 — How to Install New Sony WH-1000XM3 Ear Pads
Installing the new Sony WH-1000XM3 ear pads is simple once the old pads are removed. The key is to align the mounting ring correctly and press gently until each clip locks into place.
Take your time during this step — proper alignment ensures maximum comfort, a correct seal, and the best ANC performance.
🛠 Step-by-Step Installation Guide
- Position the new ear pad over the ear cup.
- Align the plastic mounting ring with the headphone clips.
- Press gently on one side until you hear a click.
- Continue pressing around the edge to lock all clips.
- Run your fingers around the pad to check the fit is even.
🧠 Pro Tip — Work in a Circle
The easiest method is to start at one point and move around the ear cup step-by-step. Avoid pressing all at once — gradual pressure helps clips lock cleanly.
- ✔️ Start with one clip first
- ✔️ Move clockwise around the cup
- ✔️ Check alignment as you go
⚠️ If one side won’t click, don’t force it — lift slightly and realign before pressing again.
🔍 How to Check the Ear Pads Are Installed Correctly
After installation, gently press around the edges. The pad should sit flat, without gaps, and feel equally secure all around the ear cup.
- ✔️ No visible gaps around the edge
- ✔️ Pad feels evenly seated
- ✔️ Same height on both ear cups
🎯 Once installed correctly, your WH-1000XM3 should instantly feel softer and more comfortable.
⭐ Sony WH-1000XM3 Ear Pads — Perfect Fit Replacement
Designed for an exact fit, these Sony WH-1000XM3 replacement ear pads install easily and help restore comfort, seal and ANC performance.
🛒 View Sony WH-1000XM3 Ear Pads →⚠️ Common Mistakes to Avoid When Replacing Sony WH-1000XM3 Ear Pads
Replacing Sony WH-1000XM3 ear pads is simple, but a few common mistakes can reduce comfort or make the ear pads wear faster. Avoiding these small errors ensures a perfect fit and long-lasting results.
❌ Mistake #1 — Forcing the Clips
If the ear pad doesn’t click into place immediately, don’t push harder. The mounting ring may simply be slightly misaligned. Remove gentle pressure, realign the pad, and try again.
❌ Mistake #2 — Installing the Pad Unevenly
Pressing one side fully before aligning the rest can create an uneven fit. Always install gradually around the ear cup to keep the pressure balanced.
❌ Mistake #3 — Ignoring Small Gaps
Even small gaps around the edge can reduce comfort and weaken the ANC seal. After installation, run your fingers around the entire ear pad to check it sits flat.
❌ Mistake #4 — Using Universal Ear Pads
Universal pads may fit physically but often don’t match the original shape or thickness. This can reduce comfort and affect noise cancelling performance. Always choose model-specific WH-1000XM3 replacement pads.
💡 Golden rule: if something feels difficult, stop and realign — installation should feel smooth and natural.
✅ Final Installation Checklist
- ✔️ Ear pads sit evenly around the ear cup
- ✔️ No visible gaps or loose areas
- ✔️ Both sides feel identical
- ✔️ Comfortable pressure when worn
🎯 Correct installation = better comfort, better seal and longer ear pad lifespan.
⭐ Model-Specific WH-1000XM3 Ear Pads
Using exact-fit Sony WH-1000XM3 replacement ear pads makes installation easier and ensures the best comfort and noise isolation.
🛒 View Sony WH-1000XM3 Ear Pads →⭐ Recommended Sony WH-1000XM3 Replacement Ear Pads
Choosing the right replacement ear pads makes a big difference on the Sony WH-1000XM3. The correct shape and thickness help maintain comfort, passive isolation and consistent ANC performance.
Model-specific ear pads are designed to match the original structure of the headset, making installation easier and ensuring the headphones feel natural once installed.
🎧 Sony WH-1000XM3 Ear Pads — Exact Fit Replacement
These replacement ear pads for Sony WH-1000XM3 are designed to restore the original comfort and seal of your headphones, helping you enjoy long listening sessions again.
- ✔️ Perfect fit for Sony WH-1000XM3
- ✔️ Soft memory foam cushioning
- ✔️ Helps maintain ANC effectiveness
- ✔️ Comfortable for long sessions
- ✔️ Easy clip-on installation
🔎 Why These Ear Pads Work Well for WH-1000XM3
The WH-1000XM3 relies on a precise ear pad seal for both comfort and noise cancelling. Pads that are too thin or poorly shaped can reduce immersion and create pressure points.
| Feature | Benefit for XM3 Users |
|---|---|
| Memory foam | Even pressure & better comfort |
| Correct thickness | Maintains original sound & ANC |
| Exact clip system | Fast & safe installation |
🎯 Correct ear pads = comfort restored + stronger isolation + better listening experience.
🎧 Give Your Sony WH-1000XM3 New Life
Replace worn ear pads and enjoy the comfort and ANC performance your headphones were designed for.
🛒 Shop Sony WH-1000XM3 Ear Pads →🎧 Why New Ear Pads Improve Comfort, Sound & ANC on Sony WH-1000XM3
Ear pads are not just about comfort — they are an essential part of how the Sony WH-1000XM3 works. They control how your ears sit inside the ear cup, how well outside noise is blocked, and how efficiently Active Noise Cancelling performs.
When ear pads wear out, changes happen gradually. Many users don’t notice until the headset feels less immersive or comfortable than before.
🔎 What Changes When Ear Pads Wear Out
- ❌ Foam compression increases ear pressure
- ❌ Seal weakens → more external noise leaks in
- ❌ ANC feels less effective or inconsistent
- ❌ Bass response may feel lighter
- ❌ Heat builds up faster during long listening sessions
💡 Most “comfort problems” on WH-1000XM3 headphones are solved simply by replacing the ear pads.
| Old / Worn Ear Pads | New Replacement Ear Pads |
|---|---|
| Flattened cushioning | Soft, supportive comfort |
| Weak seal | Improved isolation |
| Less stable fit | Balanced pressure & secure fit |
| Reduced ANC consistency | Better ANC seal |
🔇 Why Ear Pads Are Important for Noise Cancelling (ANC)
The WH-1000XM3 ANC system works best when the ear pads form a complete seal around your ears. If tiny air gaps appear because the foam is compressed, outside sound enters the ear cup and ANC becomes less effective.
🎯 Fresh ear pads restore the seal — which often makes ANC feel stronger immediately.
⭐ Restore Comfort & ANC Performance
These Sony WH-1000XM3 replacement ear pads help restore the original seal, comfort and listening experience you had when the headphones were new.
🛒 View Sony WH-1000XM3 Ear Pads →🧭 Want the Full Ear Pads Guide?
This article covers one specific topic. For the full picture (comfort, materials, cleaning, lifespan, sound & replacement), explore our complete hub guide below.
📘 Read the Ultimate Headphone Ear Pads Guide →One hub • All answers • Better comfort & sound
❓ FAQ — Sony WH-1000XM3 Ear Pad Replacement
Is it hard to replace Sony WH-1000XM3 ear pads?
Not at all. The WH-1000XM3 ear pads use a clip mounting system, so replacement is usually quick and tool-free. If you take your time and work around the edge gently, it’s a simple process.
Do new ear pads improve ANC on WH-1000XM3?
Yes. Active Noise Cancelling relies on a good seal. When ear pads compress, tiny air gaps appear and ANC can feel weaker. New ear pads often restore the seal and make ANC feel stronger right away.
Do ear pads affect sound quality on Sony WH-1000XM3?
Yes. Ear pads affect distance to the drivers and the seal around your ears. Worn pads can reduce isolation and make bass feel lighter. Proper replacement pads help maintain the original sound balance.
How often should I replace WH-1000XM3 ear pads?
Most users replace ear pads every 6–18 months, depending on daily use, heat and sweat. If you use the XM3 often for commuting or work, replacing earlier can keep comfort consistent.
Should I replace both ear pads at the same time?
Yes — always replace both. This keeps pressure, comfort and sound balance consistent between left and right ear cups.
Can I use universal ear pads on Sony WH-1000XM3?
It’s not recommended. Universal pads can be too thin or shaped differently, which may reduce comfort and weaken ANC. Model-specific WH-1000XM3 pads provide the best fit and seal.
What if one side doesn’t click during installation?
Don’t force it. Lift that section slightly, realign the ear pad ring, then press gently again. Installation should feel smooth when alignment is correct.
💡 Tip: after installation, run your finger around the edge to confirm the pad is fully seated with no gaps.
🎧 Upgrade Your Sony WH-1000XM3 Comfort
Restore comfort, seal and immersion with model-specific replacement ear pads.
🛒 Shop Sony WH-1000XM3 Ear Pads →


Leave a comment